


The Successes and Misadventures of a Living Project
I called this kitchen renovation a living project – because it could not be accomplished in a weekend – we had to live around it. As I work part-time during the week and we’ve had family events during this time, I had to come up with plans and methods I could work around and so that the kitchen could still function.
Pre-Renovation:
- Everything had to come out – inside, outside and atop cabinets and washed.
- Sort – those things you use the most, those that will be decorative, those that need to be stored and those that will be donated. This activity took a whole day.
- Degrease and clean everything – especially cabinets before painting – my friends at Ace Hardware suggested a solution of 2 to 1 water and bleach – this is a strong solution so make sure to ventillate
- Lay down protection that can be removed and reapplied – if not you’ll spend hours cleaning microscopic paint dots-I did here and there – I got up close and personal with my wood floor. Have a wet rag or two handy for accidental spills and attend to them immediately.
- Prepare a meal or two in a crock pot while doing this and throughout the process – you’ll b e glad you did!
- Thoroughly clean and hang dry your brushes and painting tools – I know several people bag and or refrigerate – since this was a’living’ project, I could not work day after day and it was important to me that my brush and the paint were in good working order.
Renovation Process
the paint used to edge the inside of the cabinets is Behr Rain Washed – from sample pot
- Plan your work, work your plan. Even as my project developed more projects and ideas – I kept a running list to help myself see the plan and to know what was left to accomplish. Also I love checking things off a list!
- Choose a starting point – I began with the first coat of paint on the kitchen cabinets – I also painted the inside of some cabinets – this took quite a lot of paint – as the old, stained wood soaked it up – even with a paint-primer combination.
- Pay attention to detail – as I was painting, things became apparent that I had not noticed before – the moulding on top of the cabinets were not perfectly lined up and there were gaps. This is where one of my now favorite tools came into play- white paintable caulking. This can fill in gaps, nail holes, gouges anything that you want to fix to have a more finished appearance.
- Keep tools and material organized and in portable containers – as we were living through this process it was important to me to keep everything together to put away and to bring back out for future use.
- Allow for imperfections here and there. Next year our home will be 100 years old. She has quirks: crooked door frames, gashes and years worth of paint and living – I can’t expect her frames and walls to be as smooth as a 20 year old house. She has beautiful patina.
- Allow for changes and addition to plans – in my reveal post I shared with you my list of things to do and also a list of things I did that weren’t on the plan – I just added these things as I worked through this project and envisioned what I wished the room to become.
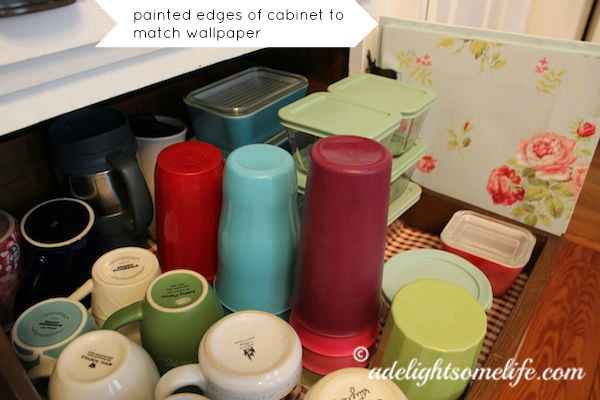
- Save where you can and allow for extravengances – I love thrift, garage sale finds – they add character and are good for the budget. Sometimes there’s something you want that cannot be imitated – for me that was the Antique Rose pattern of the Cath Kidston wallpaper. That might seem an extravegance considering I used it to line the inside of cabinets – but to me it brings the elements of surprise and delight to my kitchen design.
- Patience – I had to wait quite a while for some things to be delivered – and one delivery took extra time because I did not understand the coordination between the delivery agent and our post office. I have to share – I love living in a small town. When I discovered that my package was being delivered to the post office to be delivered to me – I called that morning – they know me and the girl said it was out for delivery. I was at work. So, I looked outside and there was our mail delivery girl – she knew I was at work and was coming inside to see if I wanted the package then or delivered to the house. I took it then! So delightsome!
- When things goof up – don’t give up! Our double oven was an Estate sale purchase – it’s white – the remainder of our appliances are black. It has been white for years – I’ve always wanted to paint it and this project gave me the impetus to do it. I thought I was clever in choosing High-Heat Spray paint in black. Even with my extensive preparation of taping plastic all round and everywhere, it was messy – I added to my work by having to clean dusty, black paint from everything! Even my newly painted white hutch! It did present a good coverage and did the job, but it was dull. Bad idea #2. Spray Poly. This turned out blotchy. So I persisted and ended up brush painting on canned Rustoleum Paint in black with a high gloss oil based – it looks wonderful now! In for a penny – in for a pound!
Redecorating Choices.
- My inspiration was Jennifer’s all-white Farmhouse style kitchen – absolutely gorgeous!
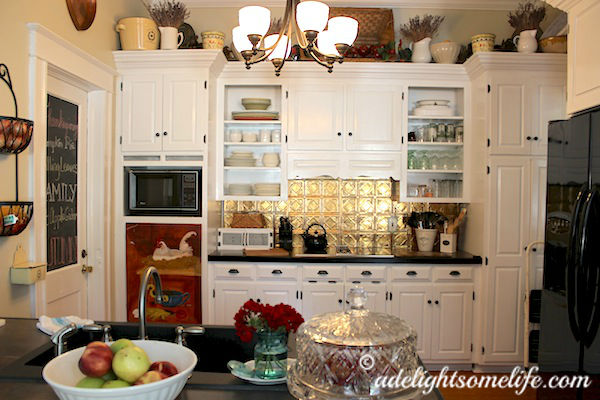
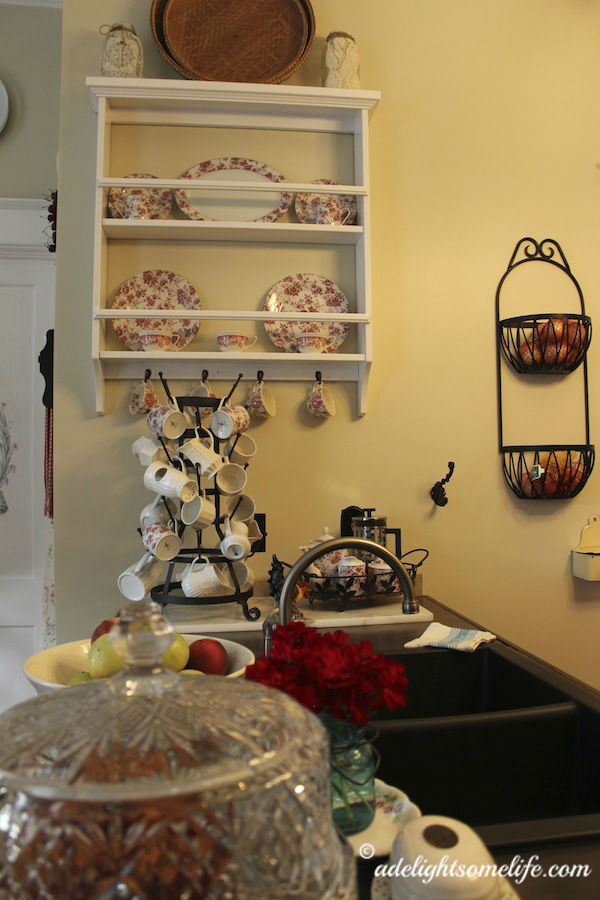
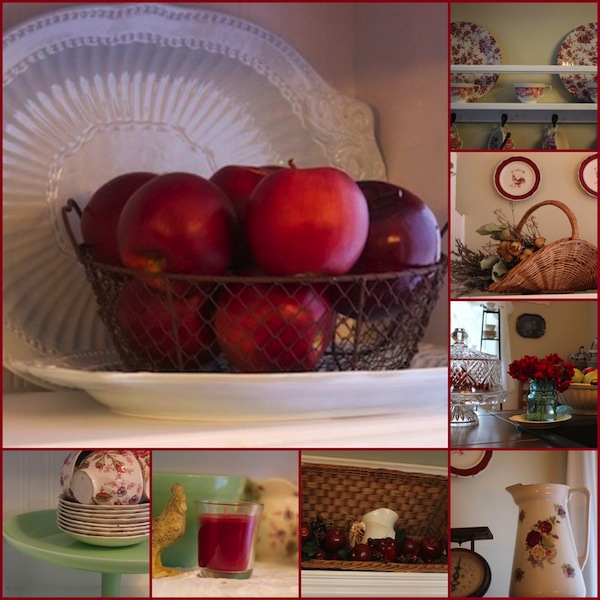
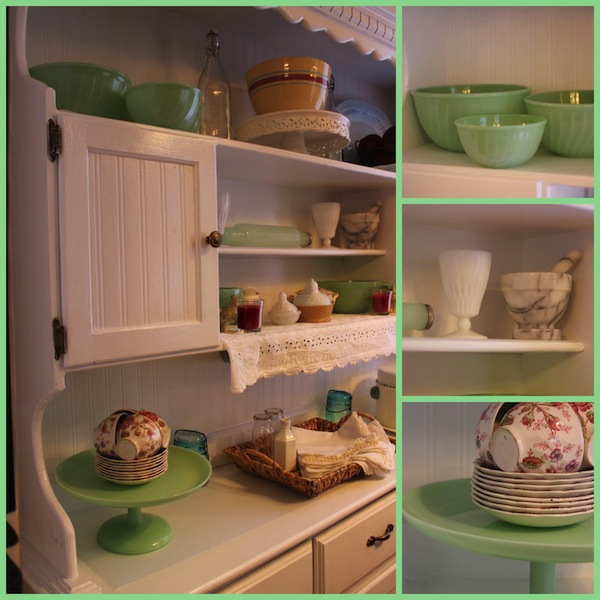
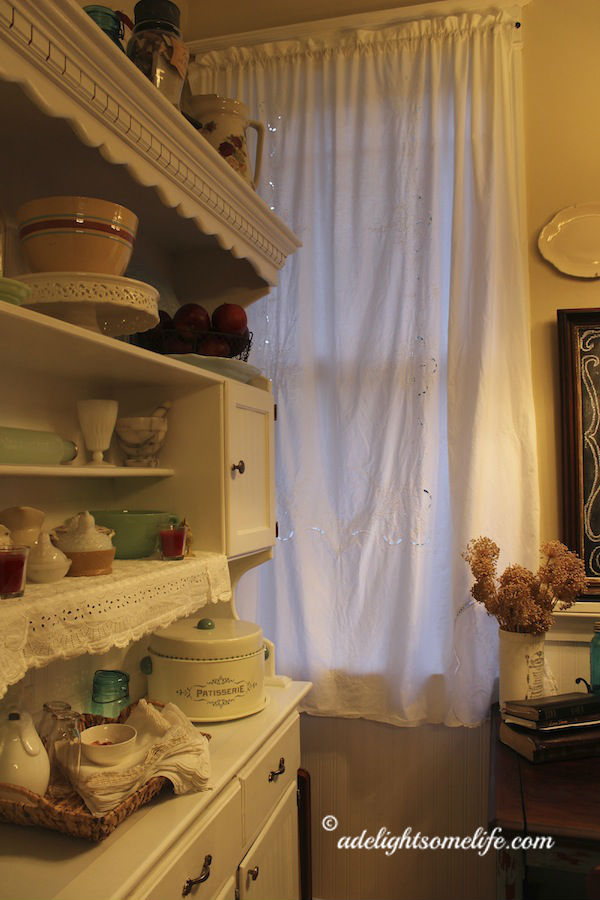
- My accessories are vintage and full of color AND I am particularly fond of red – it’s in every room here and there. My collection display on the hutch was inspired by the Cake Carrier I purchased through Cost Plus Market – a Country Living magazine find. This led to me bringing some of my Jadite collection. There’s white dishes, straw baskets, glassware, chickens and the red comes in the faux red apples, roses in the china and the red candles.
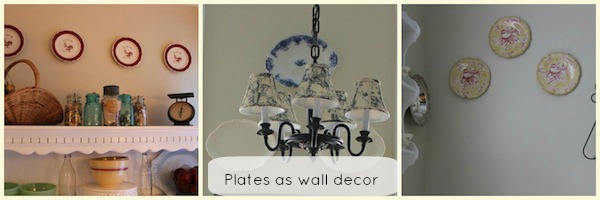
- I had some plates I loved – red ones with roosters from KMart in their Country Living collection (no longer available-try Ebay) – they started off the idea of mainly using plates to decorate the walls. Open shelving, painted white, hold vintage and new plates in red Chintz and soft florals.
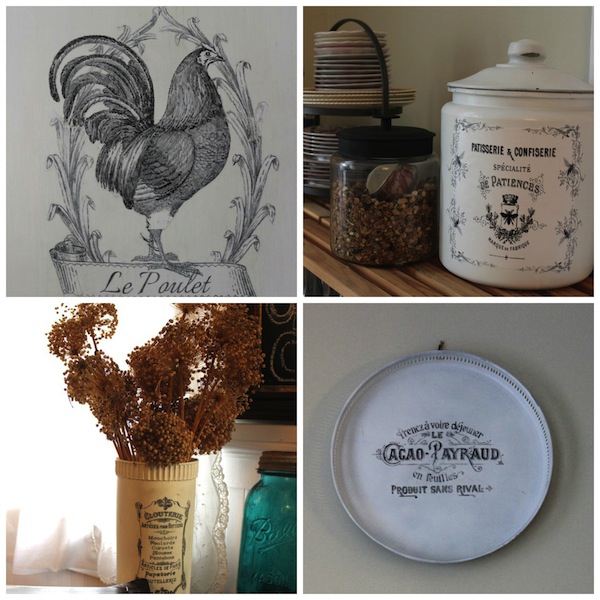
- The other element that fills the room is graphics. I adore The Graphics Fairy. She’s opened a world of possibility to so many of us. I’ve added a graphic to the laundry door, to trays, and containers.
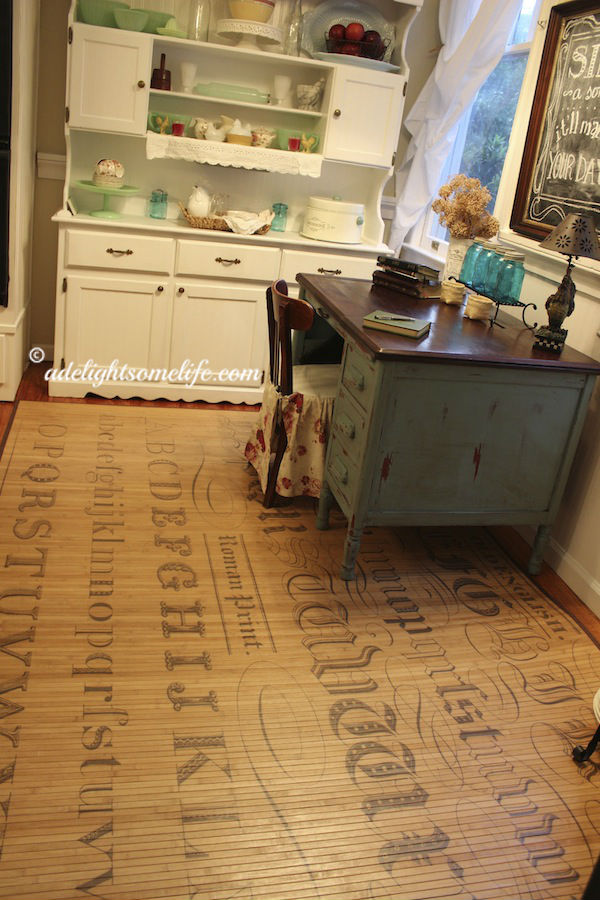
- My treat – The Tattoo mat by Peacock Park Design – several of you have had this very versatile mat – it’s simply gorgeous, more so in person and marvelous to walk on barefoot! (Jennifer also demonstrates extensive use of these mats)
- Open cabinets that will be used to display items frequently used call for those items that appeal visually. The other daily items were placed nearby in cabinets with sliding drawers.
Favorites:
- Beadboard Wallpaper – such a versatile, easy to use product that transforms walls and furniture beautifully – it is a soft product so I’d recommend it in areas where it will get less traffic – bangs etc…I used it on the far wall under the windows, on the sides of the cabinet housing the refrigerator and oven and in the doors of the hutch.
- Paintable Caulking – I’ve above shared why this is a fantastic product
- Rustoleum Black High Gloss paint oil based – small can – I used this to transform the double ovens, the switchplates, and the cabinet knobs – gives a gorgeous shine and finish.
- Chalkboard Paint
- Cath Kidston Antique Rose wallpaper – it’s purely gorgeous – love the whimsy, and I’ll be using the remainder of the wallpaper in other projects.
- Shelf liner – in red Gingham – found at Walmart and clear basketweave – found at Dollar General – I used the gingham to line the drawers and the clear on the open, newly painted shelves as well as the newly painted hutch surface – I like that you can barely see it and that it protects the surface from scratches from frequent use.
- Graphics from Graphics Fairy – absolutely delightful and versatile.
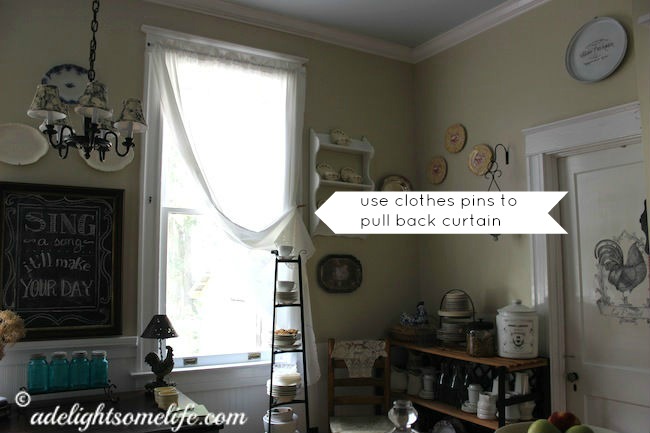
- The wall color – Rice Grain from Sherwinn Williams – inspiration from Thistlewood Farms.
- The curtains – another Estate sale find I’d had for a while – previously used as tablecloths! They add just the right look and light to the room
- white dishes – this girl can’t have enough white dishes and pitchers.
- Chintz and the color red – ditto to the white dishes note.
- The Alphabet Tattoo mat by Peacock Park Design – it is huge, fabulous and perfect!
Read about it all:
- The Inspiration – Farmhoue Cottage Style at Town and Country Living
- Kitchen Renovation Plans
- Kitchen Cabinets Painted
- Painted Hutch and Beadboard Wallpaper
- Kitchen Renovation Glimpses
- My Delightsome Kitchen – the reveal


