


It started as some things tend to do…on a whim.
About three years ago, Dearest and I decided to purchase a real tree for Christmas.
We hadn’t had a real tree for years (at the time, our youngest, now 20, couldn’t remember us having a real tree!)
We went by the woods (son’s property) and couldn’t find one…so we drove to a store to buy one.
Selecting the tree was half the fun. Singing and laughing on the way home, then Dearest and the children continued their tradition of decorating the tree.
This year time was not on our side!
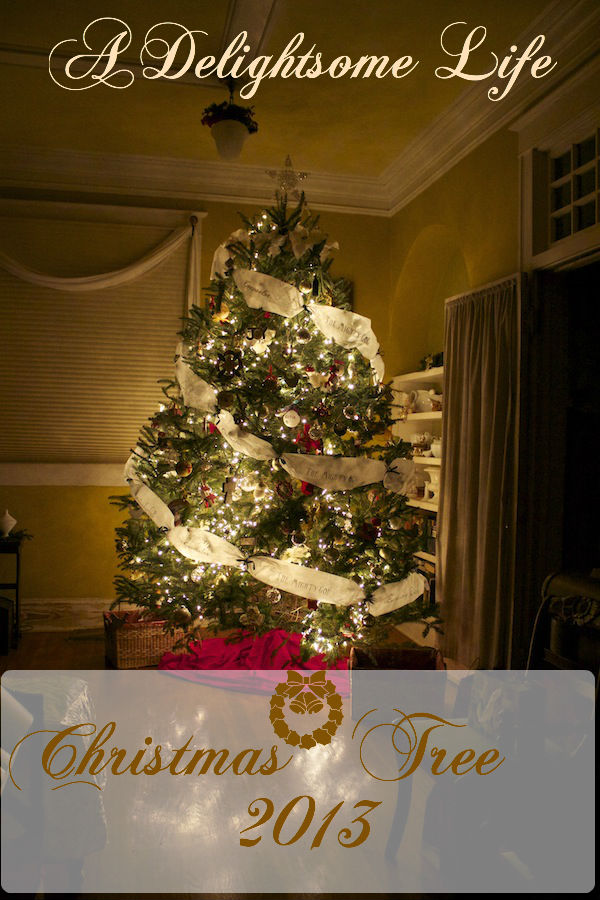
We did go out the day after Thanksgiving with our youngest – selected a tree – a whopping 9 to 10 footer! They told us that once the branches settled down, that it would also be pretty wide! They were right!
Dearest began by putting on the lights….getting the children back together to decorate was challenging.
They got together Saturday and began to decorate the tree – five hours before the Christmas party!
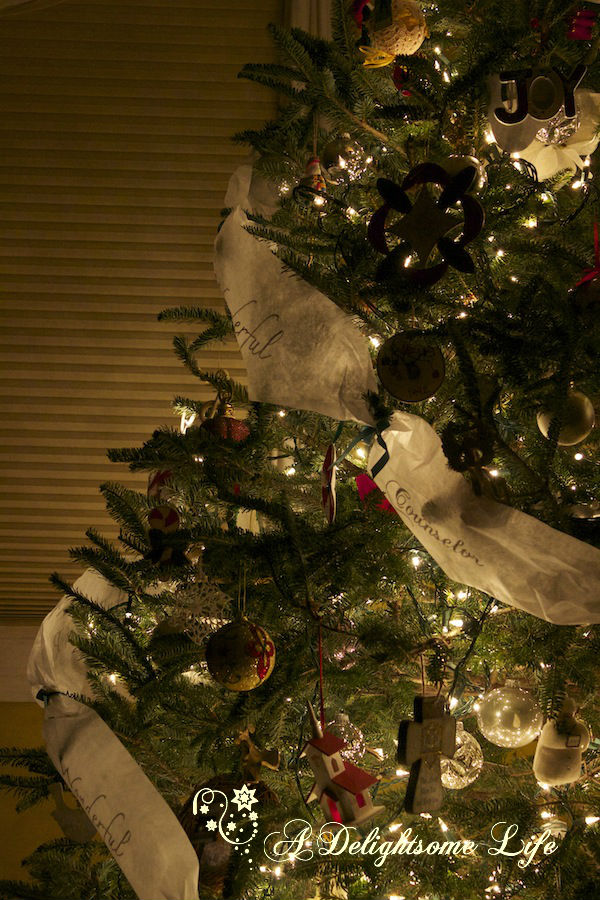
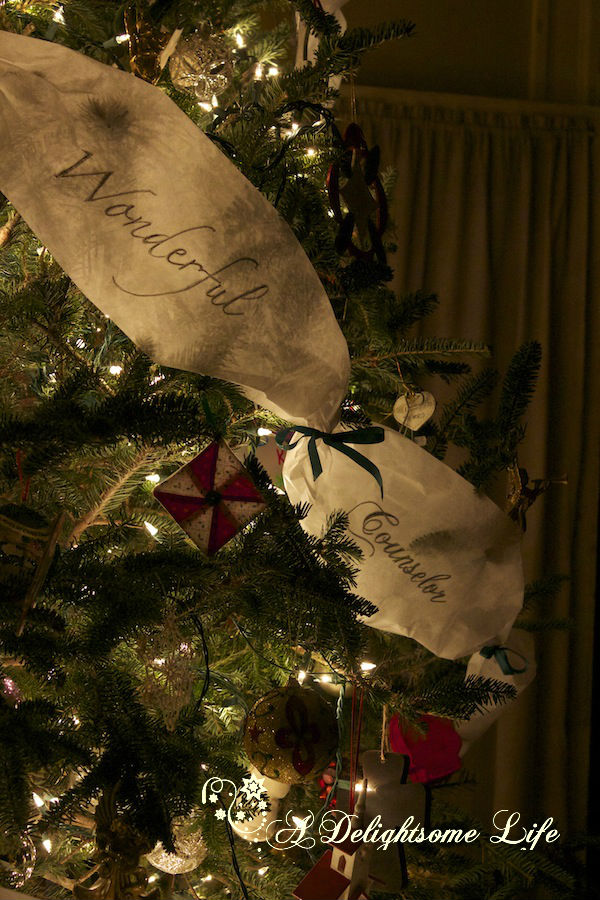
Earlier, I showed Dearest Janis at All Things Beautiful’s tree – specifically her banner. I just loved what she did.
So did Dearest. He liked it so much, he asked if I could somehow recreate it. I didn’t have the same type of paper, but I did come up with a solution – for this year.
After much thought…I came up with an idea. Baking Parchment paper. I’d already used parchment with graphics on candles and loved the look.
The problem was that the paper was 15 inches wide. Too wide. I cut it back to eight inches. Still pretty wide, but it’s a big tree!
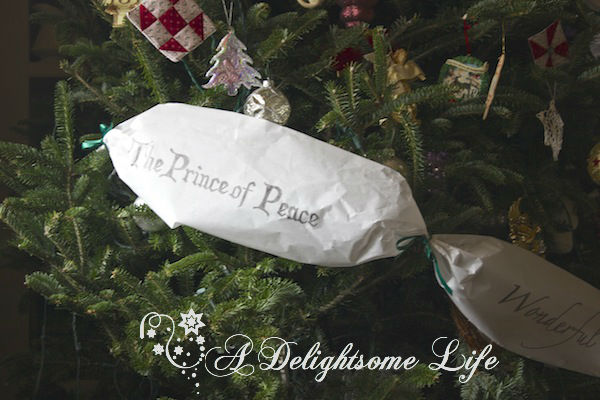
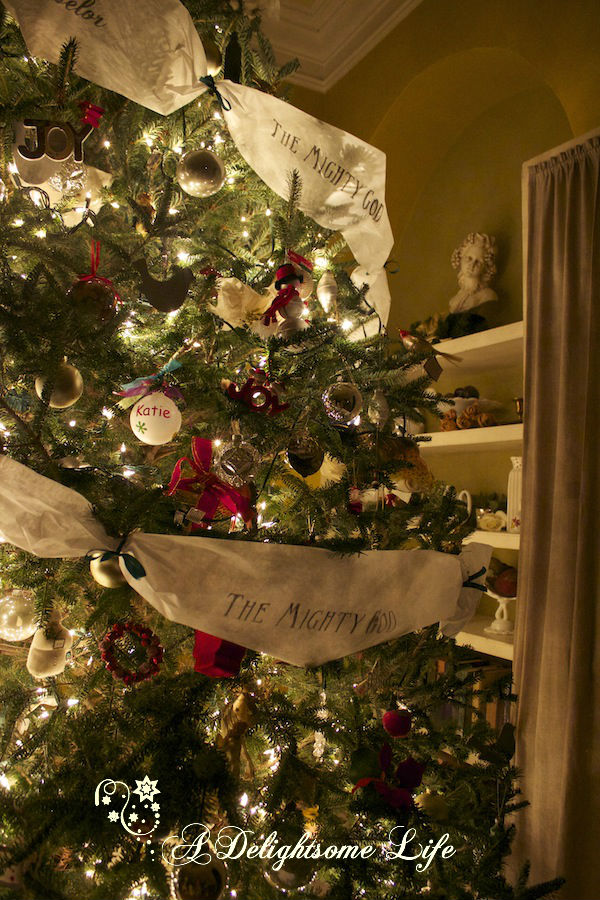
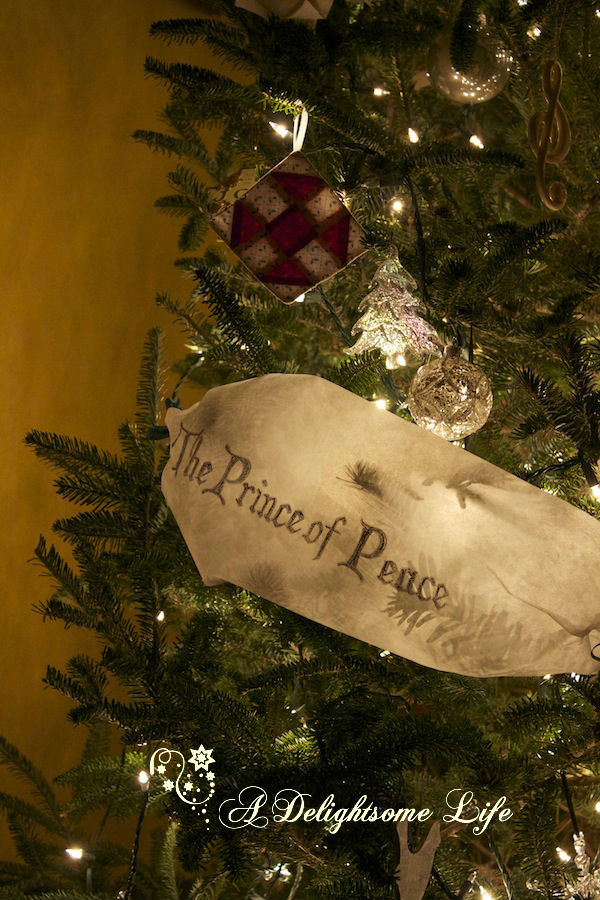
The words used are the names given to Jesus Christ in Isaiah 9:6, ‘For unto us a child is born, unto us a son is given: and the government shall be upon his shoulder: and his name shall be called Wonderful, Counsellor, The mighty God, The everlasting Father, The Prince of Peace.’
I used several of the same fonts Janis did, with a few exceptions.
I printed out the words at 144 printing the page on landscape setting. I then traced the words onto the parchment with a Sharpie – the parchment seemed to ‘reject’ the ink, it was light, but after I did each name, I went back and retraced over twice – sometimes three times to get darken the letters. I allowed enough space between by measuring out the paper (11 inch side) width between. Initially I only copied the names twice, but for our tree that wasn’t enough. I ended up repeating the names three times.
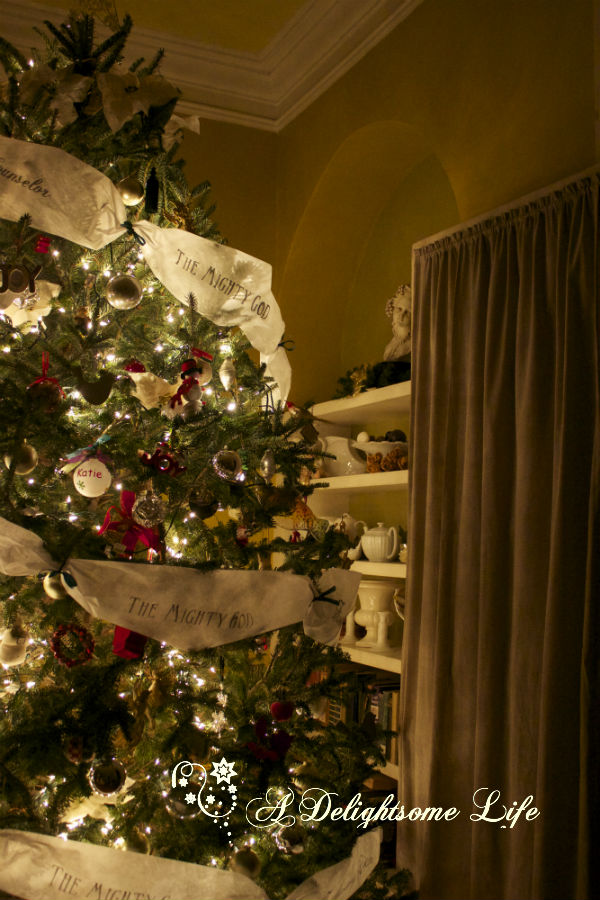
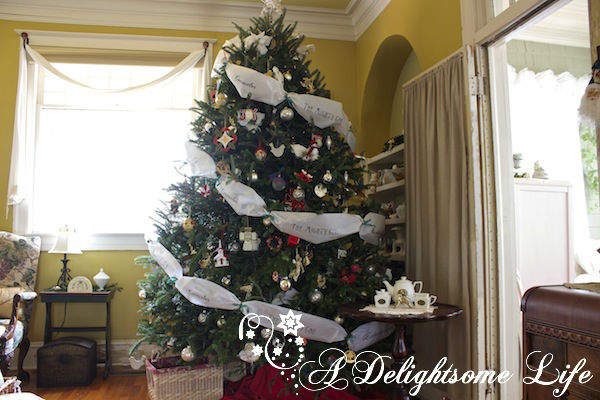
To attach the banner I accordian folded the blank space between each name and tied the banner at the fold to a branch with thin green ribbon. The children loved the look.

I love the result. The Parchment paper is sturdy enough, yet shear enough to allow the lights to glow through.
Fonts Used
Wonderful – Zapfino
Counselor – ChopinScript
The Mighty God – Birmingham, elongated
The Everlasting Father – Precious
Prince of Peace – Christmas Card

Dearest and the girls did a wonderful job with the tree…I love how they placed ornaments deep within the branches and out at the tips – giving the tree beauty and depth. I am thankful to Janis for her lovely idea, and for Beth at Unskinny Boppy for sharing how to take a picture of a glowing tree.
I am sharing this post with these Delightsome Blog parties:


